Guide to Planting and Maintaining Monstera Albo Nodes
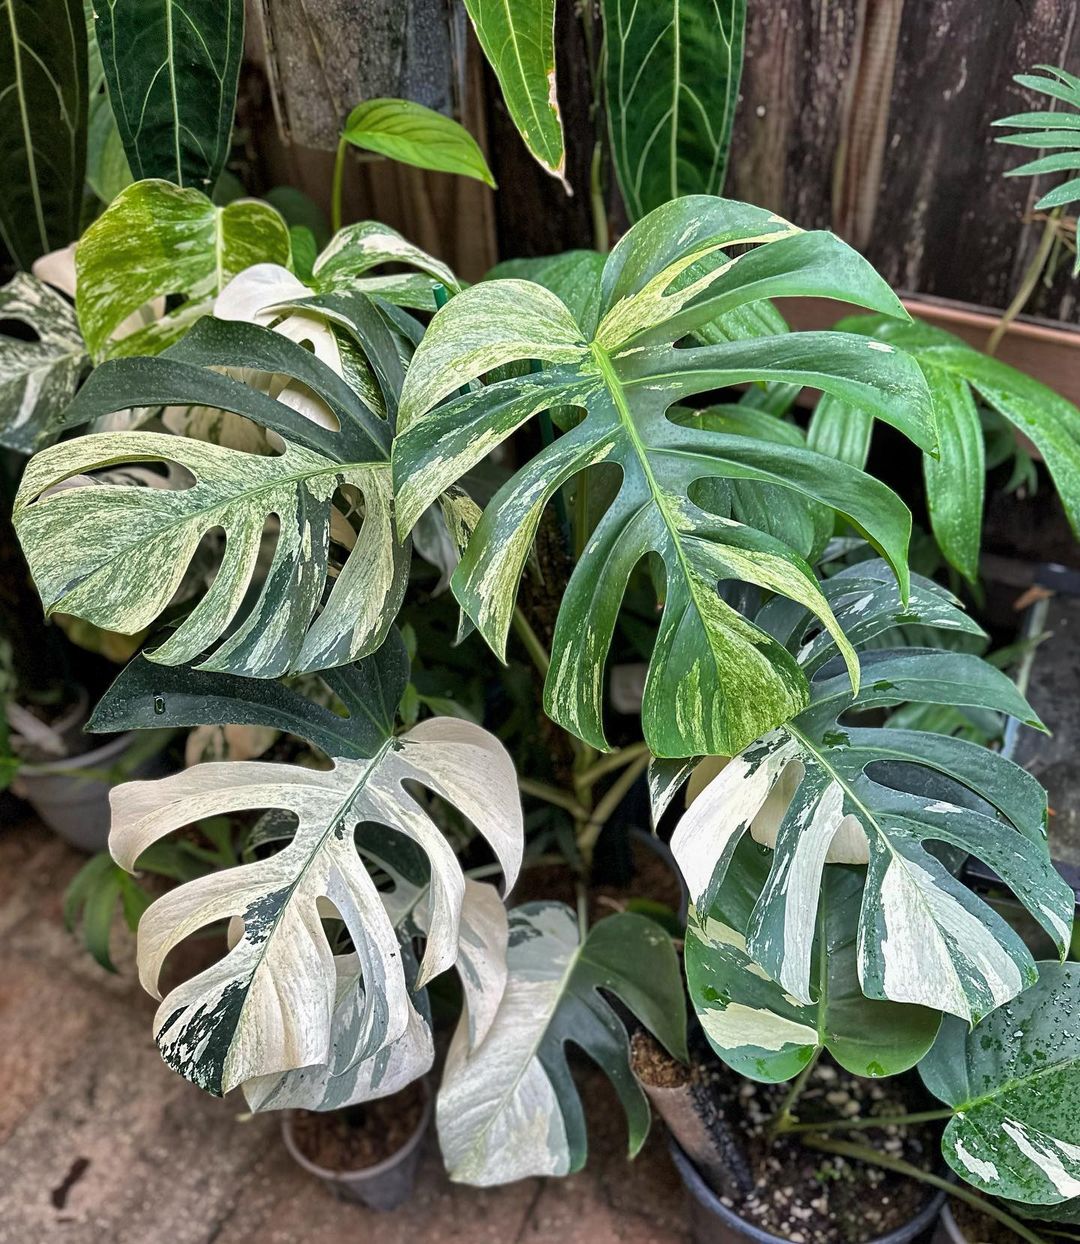
Monstera Albo Nodes are very challenging for beginners and even experts. Growers should have knowledge about indoor plants before attempting to care for these nodes. Learn how to create an ideal habitat and ensure their vibrant health with Wet Tropical's detailed guide, designed for plant enthusiasts who want to enhance their gardening skills!
1. What is a Monstera Albo node?
Monstera Albo Nodes are discernible as brown, circular, bumpy segments along the plant stem, where new branches, leaves, and roots originate. They serve as active sites for cellular activity crucial to the plant's growth. In simpler terms, nodes house specialized cells capable of generating new plant components, contributing significantly to the overall development of the plant. Certain cells undergo growth and differentiation to give rise to roots, while others contribute to the formation of leaves and additional plant structures.

The segment of the stem between any two nodes is referred to as an internode. A new internode emerges above each node, with leaves developing around the nodes, often enveloped by a papery sheath.
2. Can you propagate Monstera Albo without nodes?
The cultivation of Monstera Albo stands out among other houseplants due to its slow growth rate and high maintenance needs. Seeds often fail to inherit the distinct traits of the parent plants, resulting in young Monstera Albo specimens lacking the characteristic variegation. Moreover, Monstera Albo Nodes play a crucial role in propagation; stems, leaves, or roots without nodes are generally unsuccessful in propagating, as they lack the capability to develop the necessary roots for vertical growth. Even though stem, root, and leaf cuttings may initially show green growth, their absence of nodes often leads to their failure to mature into fully developed plants.
3. Essential steps for propagating Monstera Albo
Propagating Monstera Albo can be achieved through two methods: water and soil. Although their procedures differ, both methods share the same initial two steps.
Step 1: Identifying nodes
The variegated Monstera Albo node, with its distinctive characteristics, offers a helpful visual cue for locating nodes. The plant presents noticeable, raised, and at times brown bumps along its stems, effectively signposting the positions of nodes. These conspicuous indicators make the identification process relatively straightforward, offering a tangible guide for those seeking to understand the anatomy of their Monstera Albo. For those encountering difficulty in pinpointing nodes, a strategic approach involves focusing attention on the bottom two-thirds of the plant.

By directing attention to the lower segments of the plant, enthusiasts and caretakers can tap into the plant's natural tendency to produce nodes in these regions. This understanding not only facilitates the identification of nodes but also serves as a practical guide for those keen on propagating their Monstera Albo. Attentive observation combined with understanding the plant's growth patterns is key to successfully growing a thriving variegated Monstera Albo population.
Step 2: Preparing the cutting
After identifying the nodes, you should proceed to make the cut. Use your cutting tool to make a swift and clean incision, approximately two inches below the node. It is important to ensure that the cutting measures between 4 to 6 inches in length. A shorter length may lack sufficient stem for rooting, while a longer length can pose challenges in balancing within a pot or vase.
When making the cut, angle your houseplant scissors or knife at a 45-degree angle towards the node. This orientation maximizes the surface area for water absorption and encourages robust root development.
Step 3: Enhancing root development
Once you've obtained your cutting, the next step is to choose a method that fosters robust root growth, ultimately resulting in a healthy new plant. Allow your cuttings to air dry for approximately 10 to 20 minutes before initiating either method. This helps reduce the risk of rot when introduced to the soil.
The water method
The water method for propagating Monstera Albo is simple and efficient. Begin by placing your cutting in a transparent glass vase, preferably one with a tall, broad design to accommodate root expansion and ensure ample airflow. Fill the vase with filtered water, maintaining a level about 2 or 3 inches above the node.
The soil method
Soil propagation, while more involved, reduces plant stress when transitioning from water to soil. This method often results in a larger, healthier plant, especially for cuttings with long stems or multiple leaves. Start by filling a clean pot with a soilless potting mix that holds moisture without inducing root rot and enhances air circulation for root growth.
After filling the pot, create a hole for your cutting, using your fingers or a trowel. The depth of the hole should be around 2 to 4 inches, depending on the length of your cutting. Place the cutting in the hole and cover it slightly with soilless potting mix, ensuring it can stand on its own. Keep the soilless potting mix consistently moist but not waterlogged, maintaining the same environmental conditions as with the water propagation method.
Step 4: Monitoring and providing support
Regardless of the chosen method, successful propagation of variegated Monstera Albo requires careful observation, minor supportive care, and patience. The objective is to wait until five or more lengthy roots, each several inches long, emerge from the base of the cutting. This process can take approximately six to eight weeks in water and up to four months in soil, depending on whether or not a houseplant propagation promoter is utilized. Throughout this period, maintaining consistent environmental conditions is crucial.

Stems lacking nodes are unlikely to successfully propagate
For the water method, regularly replenish the vase with fresh water and discard it if it becomes cloudy, yellow, or emits an odor. In the soil method, it is imperative to keep the potting mix damp but not soggy. This can be achieved with a spray bottle or by placing the pot in a tray of water, allowing it to absorb moisture from below.
Periodically inspect the roots for any signs of rot, as it can rapidly spread and jeopardize the plant's health. If you notice black, moldy indications of root rot, carefully remove the affected area with a sterile blade and transfer the cutting to a new pot with fresh potting mix or water.
Step 5: Planting rooted cuttings
With healthy cuttings showcasing a robust root structure of at least five tendrils, each several inches long, you can proceed to the next stage of the propagation process. Before undertaking this step, it's advisable to prepare all your planting materials. Ensure that the pots are clean, slightly larger than the cluster of roots, and equipped with drainage holes in the base.
To streamline the process and prevent accidental root damage, consider placing a layer of Monstera plant soil at the bottom of the pot in anticipation of the new cuttings. Utilize well-draining soil composed of equal parts coco coir, coco peat, perlite, orchid bark, and IBI-certified Biochar. These components provide a light and airy texture crucial for the continued successful growth of the plant.
For cuttings obtained through the water method, delicately move them within the vase to loosen and release roots from the sides. Then, use your fingertips to gently separate gnarled or intertwined roots. If the soil method was employed, carefully remove the top layers of potting mix until the roots become visible. Using your fingers, gently lift and massage away the potting mix from around and within the root system.
Once liberated from their original containers, it's time to transfer the matured cuttings into the new pot. Position the matured cutting in the center of the pre-filled pot, surround it with soil until it reaches an inch or two below the rim, and lightly press down the topsoil to ensure it is not too loose.
4. Nurturing propagated Monstera Albo
Caring for freshly potted Monstera Albo cuttings is straightforward, following the same requirements as those for mature Monstera Albo plants in a suitable tropical environment.
- Lighting: Place the cuttings near a dappled light source for 8-10 hours daily until they develop roots or leaves. Avoid direct sunlight from south or west-facing windows, as it can quickly deplete soil moisture.
- Temperature and Humidity: Maintain a temperature range of 70-85°F and humidity levels between 50-80%. Keep the cuttings away from radiators, heaters, or cooling vents that could cause drastic temperature fluctuations.
- Fertilization: Once the cuttings have established strong roots and healthy leaves, feed the plant with a half-strength liquid fertilizer with a ratio of 20-20-20 on a monthly basis.
- Watering: Water the soil every 1-2 weeks, ensuring you check for soil dryness between waterings.
- Pruning: In the spring, prune the plant to remove dead or decaying leaves.
- Repotting: Repot the Monstera Albo every 2-3 years, especially when the roots extend from the pot's drainage holes or when they become entangled on the topsoil.
- Pest and Disease Management: If pests or diseases occur, apply neem oil every 1-2 weeks or every 3 days when the outbreak becomes noticeable.
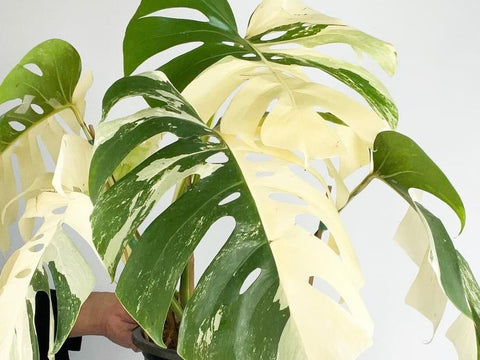
Soil propagation reduces plant stress when transitioning from water to soil.
By following this guide's insights, you'll nurture healthy, vibrant plants that add a touch of nature's beauty to your space. Embrace the joy of watching your Monstera Albo flourish with proper care and attention. Check out our store for a great collection of Monstera Plants.
No comments



0 comments